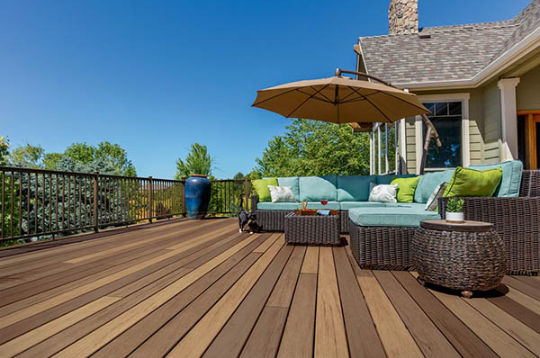
Any outdoor area can be enhanced aesthetically as well as in terms of functionality by means of a properly maintained wooden deck. In addition to improving the natural beauty of the outdoor wooden deck, stain protects it against harsh weather, ultraviolet rays and wearing by feet. That is why with this extensive guide we will show you all the details you should know so that you can stain your deck like a pro and that includes prep and finishing details.
Why Deck Staining Important
The outdoor decks have unending exposure to sun, rain and variations of temperatures. Staining is the protection layer which stops moisture, prevents rot and mildew, and fades. Also it restores or replenishes back the natural grain and hue of the wood making your deck look new and interesting.
Things Required :
- First, you will need to collaborate the following:
- Deck Cleaner
- Deck Brightener (vol. op.)
- Outdoor Wood Sealer (Oil or Water)
- Rollers and paint Brushes
- Stain Pads or Stain Pads and Sprayers
- Sand paper or Power sander
- Deck Stripper (for old stain removal )
- Pressure Washer
- Plastic Sheeting/ painters Tape
Steps that form a systemised process of staining an outdoor wooden deck:
1. Maintenance and Repair
First, examine the deck to see broken boards, loose nails or screws. Repair broken, bent and rotten planks as well as loose or wobbly railings. All the further work begins with the structural stability of the deck.
2. Surface Cleaning
A well-cleaned surface is demanded to have proper adherence of stain. Apply a good deck cleaner and scrub off the fungus, mould, mildew and any left over product. Remove this by a garden sprayer or a stiff brush with the cleaner which is to be applied and left to stand ten to fifteen minutes. Clean the deck using a pressure washing so as to keep a reasonable distance otherwise the wood may be damaged by the washer. When existing coats are on the deck a deck stripper must be taken to remove them.
3. In use Of Deck Brightener
Deck brighteners clear the wood, open their pores and bring out natural colour. They are especially helpful once you have been exposed to the powerful cleaners or strippers. Leave the brightener to be acting and after it is done rinse thoroughly.
4. Full Drying
This is an essential step, which is ignored often. Humidity in wood does not allow the stain to be taken in well. Allow the wood to dry at least forty-eight to no more than seventy-two hours (depending upon weather conditions); use a moisture meter if you are uncertain (sufficient dampness is less than 15 percent).
5. Staining Application
After the deck is 100 percent dry, the stains may be applied. Select a good stain colour and spread it on the surface uniformly. By doing such, a finished product can be made which is not only aesthetic looking but also structurally competent.
6. Select the appropriate stain:
Stains are of basically three categories:
- Transparent: Presentation of a lot of wood grain and as less color as possible.
- Semi-Transparent: Gives color and imparts wood look as well.
- Solid: The largest coverage and protection against the UV rays; it conceals the flaws but obscures the natural grain.
- Oil based stains are more permanent and are deeper in their penetration whereas water based stains are easy to clean and dry quickly.
7. When stamping the stain, it should be applied right.
Apply on big surfaces with a stain pad, a roller, or a sprayer; get into corners and railings with brushes. Use small areas at a time keeping wet edge in order to prevent lap marks. Do thin, smooth applications- the average deck only need one application, but read instructions.
Do not overdo the stain as anything beyond it has a tendency of peeling.
8. Allow It To Dry, and be Cured
It is important to allow the stain to dry according to recommendation which is normally 24 to 48 hours foot traffic. It is not advisable to put furniture or heavy objects on the deck during the time. Curing can even last a week and therefore planning is needed.
Tips to Deck Staining
- Weather Matters: Select a mild temperature day (50 o F-90 o F) and low humidity. Does not stain in the direct sun or in case of rain.
- Test First: A stain should always be tested on a test spot because it comes in a small and discreet area so that there is the preferred color and compatibility.
- Keep Cleaning: Clean deck once a year and re-staining after every two to three years according to the amount of traffic and exposure.
Is it important to employ a specialist?
Although DIY deck staining can most certainly be done, there are instances where homeowners take the services of professionals like Hemp Shield when the deck is big or railings involved are complicated. Professionals are also able to provide the most appropriate type of stain in relation to the age of your deck, wood species and sun.
Final Thoughts
A correct staining is more than an aesthetic improvement. It is a very important maintenance measure which increases the life of your deck and makes it to remain attractive over the years. It is important, every step, in the prep, and in the application. In refreshing an old or safeguarding a new deck, these are the very steps you need to complete in order to have a lasting and beauty finish.

